The AnyLogic Connector
This page will guide you through the process of setting up your connection from the AnyLogic side. To help make the explanation more clear, we will be using the CartPole-v0 example.
Note
You may find the source code of the CartPole-v0 here.
The summary of steps required to follow are:
Add ALPypeRL Connector Library to your AnyLogic Palette.
Drag and drop an instance of ALPypeConnector to your root (also defaulted as
Mainthe first time you create a model).Add
ALPypeRLClientControllerinterface to the list of interfaces in your root agent and implement the required functions.Call
requestActionwhen the RL agent in the simulation requires a new action (or a new instruction) to continue with the run.
Add ALPypeRLConnector library to your AnyLogic Palette
To begin, you must add the ALPypeRL Connector Library to your AnyLogic Palette. If you are not familiar with AnyLogic, this step is quite straightforward. You simply need to locate the green cross at the end of the Palette screen (the location of the Palette may vary based on your AnyLogic view arrangement, but it is usually presented on the left-hand side together with the Projects structure).
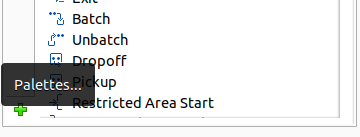
Once you have located the green cross, click on it and select Manage Libraries…. Then, click on the Add button and select the ALPypeLibrary.jar file. Note that this is a link to download a library that was generated and is only compatible with AnyLogic 8.9.x. There is also a link ALPypeLibrary.jar to the library compatible with AnyLogic 8.7.x and ALPypeLibrary.jar to the library compatible with AnyLogic 8.8.x.
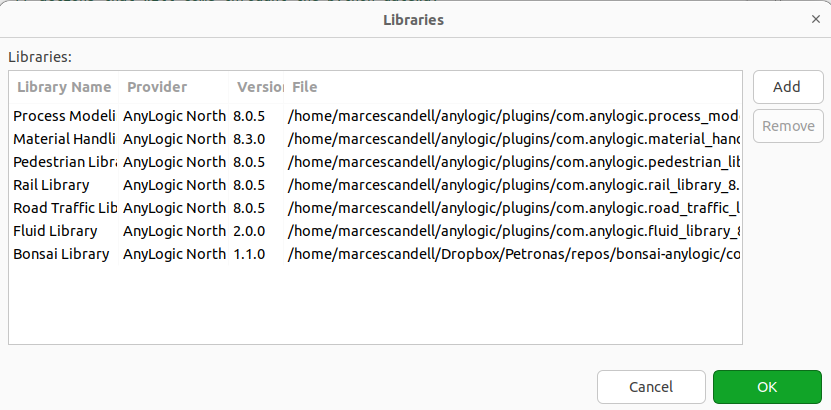
You should now be able to see the newely added library in your list of available libraries at the Palette.

Drag and drop an instance of ALPypeRLConnector
Now that you have access to the ALPypeRL Connector from AnyLogic, you can proceed by dragging and dropping an instance of it into your model.
Warning
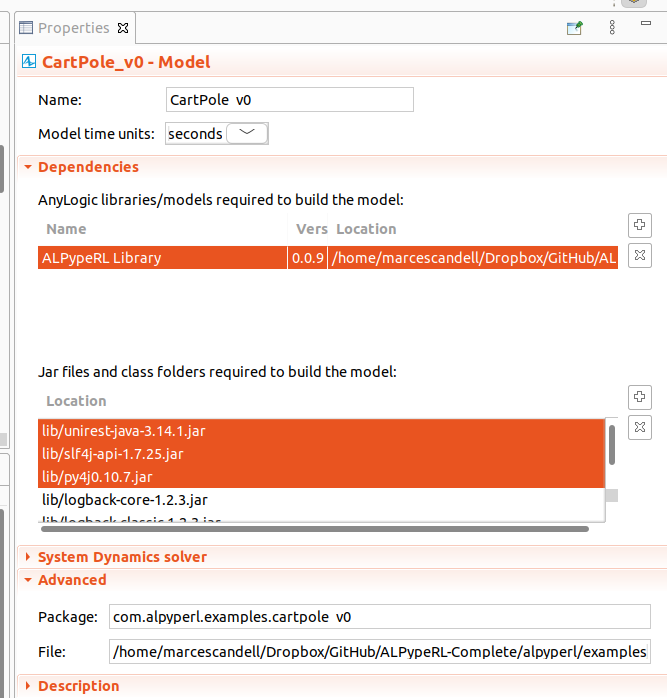
Please note that when creating a custom library in AnyLogic, the additional required dependencies are not included in the package by default. While that remains a problem, you will need to include them manually.
You can download them here.
Just click your project on the Projects tab and go to Properties. There you can add other dependencies manually at Jar files and class folders required to build the model as shown in the image:
It’s important to note that you should place the connector in your root agent. If you’re not familiar with AnyLogic, the root agent is the one that usually holds and compiles the other objects in your simulation (it’s like the home for everything else).
Tip
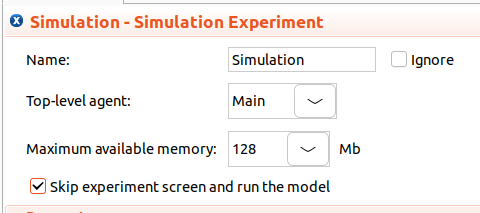
Another reference you can use to identify the root agent, it’s the one that you select when you set up your Simulation experiment as the Top-level agent. See the image below:
Implement ALPypeRLClientController
This is a very important step in order for the ALPypeRL Connector to understand what it needs to do when the training starts or when you are evaluating your policy.
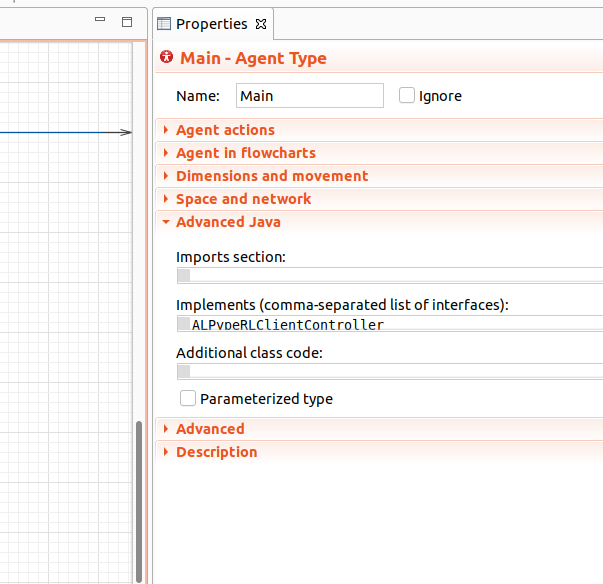
First, you must add ALPypeRLClientController to the list of interfaces of your root agent. To do this, first click on a random point in the canvas of your root agent (usually named as Main) and then navigate to the Properties page. Scroll down to find the section Advanced Java. You should be able to see Implements (comma-separated list of interfaces). Then you can add ALPypeRLClientController.
Next, if you try to compile your model, you will be getting at least 4 new errors as shown in the image:
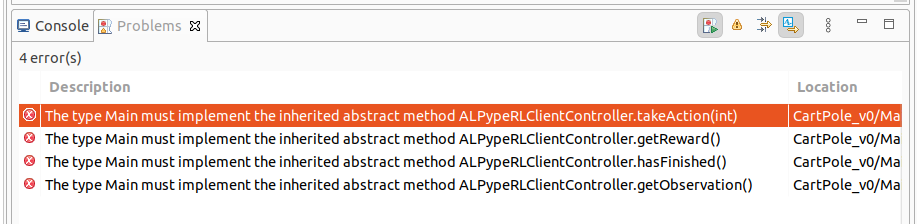
These errors indicate that, if you plan to implement the interface, you must also implement these functions (it’s kind of a contract that you have decided to sign).
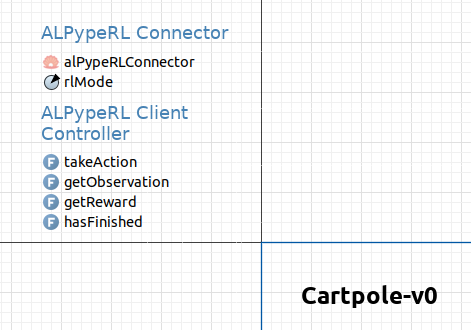
You can now drag and drop 4 new functions. Their arguments and return types must be as follows (otherwise the compilation error won’t go away):
void takeAction(RLAction action): This function is called by the RL algorithm to provide an action to the agent in the environment/simulation. Use theRLActionargument to apply the action in your AnyLogic model.Note
The action type must match what you have (or will define) in your action space which you might decide to define from java or through python if you decide to create a CustomEnv (optional). Refer to Gym Action and Observation spaces for more details.
Number[] getObservation(): This function returns the current state of the environment as aNumber[]array.Numberis a java abstract class for the typesInteger,Double, etc. This will be specially useful if your space has a mix of discrete and continuous values.Note
Just like before, observation type must match what you have (or will define) in your observation space. Pay special attention if you are defining your space from python.
double getReward(): This function returns the reward obtained by the agent in the current step.Warning
Note that this should not be a cumulated value (e.g. in the CartPole-v0 example, the cart gets a reward of
1for every step that manages to keep the pole straight and within boundaries). This step reward of1is what should be returned by this function.boolean hasFinised(): This function returnstrueif the simulation has reached a stop criterion. (e.g. the pole attached to the cart has exceeded a certain non-recoverable angle or the simulation has reached the end).
Call requestAction when the RL agent in the simulation requires a new action
Important
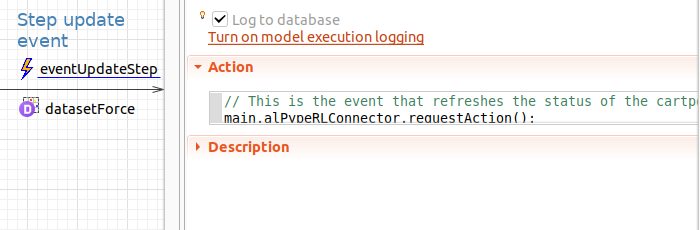
In this last step, you simply must call requestAction() at the location where your agent will need to receive an action so it can proceed.
The function is accessible from the alPypeRLConnector instance (e.g. alPypeRLConnector.requestAction()).
In the CartPole-v0 example, there is a cyclic event that updates the status of the system (horizontal positon, cart speed, pole angle and pole angular velocity). At this point in the simulation, the cartpole is requesting the next action, which is either to apply a force to the right or the left.
In your custom model, you will call requestAction() at the location where your agent will need to receive an action so it can proceed (not necessarily in a cyclic event).